Second part about my journey with the new Mac Mini M4 (first post here) and surprise surprise is about PCF development!
I usually don't code PCF components because most of the time I can find the one I need inside PCF Gallery, there are more than 550 components listed there, so big kudos to all the authors.
PCF development usually brings people not familiar with Power Apps/Power Platform inside the ecosystem, when a new control is published inside PCF Gallery I don't ask where they developed it but I suppose someone used a Mac.
First piece is to install Visual Studio Code, it's cross platform, perfect.
To develop PCF controls we need two important components:
- NPM
- Microsoft Power Platform CLI (also knows as PAC CLI)
To install NPM there are several ways, I installed first Homebrew (remember to add to the path by using the commands listed after the installation) and after I launched the command brew install npm.
To install the Microsoft Power Platform CLI you can install this Visual Studio Code extension:
BUT before installing this extension you need to have the .NET SDK on your machine, otherwise you get an error.
The latest versions of .NET are cross platform, I installed the SDK Installer, macOS Arm64 version from the official site:
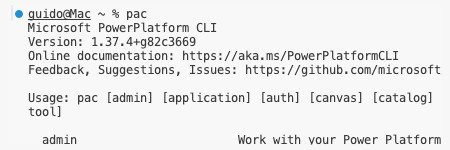
After the SDK, proceed to install the Power Platform Tools extension and we can verify the PAC CLI is installed by running inside the Visual Studio Code Terminal the command pac:

With NPM and PAC CLI we can now create a new PCF, just follow the Microsoft documentation for the right syntax:
Once you have the structure inside your Visual Studio Code you edit and test the PCF as usual, in my case I recreated my PCF Custom Url Control.
There is also a Microsoft documentation page on how to create a solution and package the PCF inside it:
Note: the path written inside the documentation is Windows style (c:\), as we are on Mac we need to use a different style, example:
pac solution add-reference --path /Users/username/folder
and because we have the .NET SDK installed we can use the command
dotnet build
this will create an unmanaged solution inside a debug folder, if you want a managed solution you can run the command
dotnet build -c release
Once you have the solution you can install it inside your environment and configure the PCF. A screenshot of my component inside a form:

What I will write inside the next episode? I don't know yet!

0 comments:
Post a Comment