November 17, 2024

a Canvas app for bus tickets? Possible!

A month ago I attended Scottish Summit 2024 in Aberdeen, because was a new place for me I decided to visit the city and I used the public transportation.
I downloaded the "Stagecoach" app and I bought a ticket, it appeared like this screenshot:
When I launched the app I was surprised, in addition to the QR Code in the top there is also a centered colored bar, switching between the time and a random word.
The colored bar also tilts based on the accelerometer of the mobile phone.

Why they implemented this colored bar? The reason (in my opinion) is to facilitate the driver to check the ticket validity without scanning the QR Code.
  • Color and word change every day, today can be green with the word "house", tomorrow can be red with the word "crisp", probably at the beginning of the shift the driver knows the color and the word of the day.
  • The switch between the time and the word and the tilt is to show you are inside an app and is not a screenshot
After I used the app I asked myself: "Can I build a Canvas App with similar concepts?"
I usually don't do Canvas apps but this was interesting to me for two reasons:
  1. it's not the usual gallery/edit data app
  2. I am implementing a real business scenario
Let's start with the QR Code, there are some PCF controls but I wanted to keep it as simple as possible, so I used a service from this site: https://goqr.me/api/
It returns a QR Code as image with the text I want, for example this one shows my LinkedIn profile:

The challenging part is of course the colored bar.
First of all I needed to display the current time, so I added a Timer (with AutoStart equals true and Duration 1000 - 1 second) where I wrote the following formula:

Set(CurrentTime, Now())

In this way I have a variable updating every second with the current time (Now function).

After I added a label to display the time, I just want to show hours and minutes, so the formula for the Text property is:

Text(CurrentTime, "HH:mm")

After I needed to switch between the time and the word, I decided to create a second label with some dummy text and I needed some logic to make visible the first label and hide the second (and vice versa) every X seconds.

Another timer then, this time running every 3 seconds and with AutoStart true. Power Fx has the Mod function, if I do a formula Current Seconds MOD 2, I get 0 or 1. Because the timer runs every 3 seconds, I am sure he seconds will be one time odd and one time even. Let's wrap everything in this formula: the variable is named CurrentMode, it fetches the seconds of the current time, converting it to a number (Value function)

Set(CurrentMode,Mod(Value(Text(Now(), "ss")),2))

Now I can use the variable CurrentMode for the Visible property of these two labels, one is set to CurrentMode and the other to !CurrentMode. In Power Fx 0 and 1 are equivalent to false and true statements.

Next step is the tilt, I didn't find a way to rotate a shape inside a canvas app so I decided to change the vertical position of the labels based on a device property. I used the Compass.Heading but there are others functions you can use.
The formula I applied for the Y property is the following:

350+(Compass.Heading)

So every time I move the mobile phone, the label position gets updated.

Now we need to take care of the color, for simplicity I assume each day has a different color, so the Fill property of the label is a Switch statement based on the Weekday of Today (Weekday returns a value from 1 to 7). Formula:

Switch(Weekday(Today()), 1, Color.LightBlue, 2, Color.Orange, 3, Color.LightGreen, 4, Color.Yellow, 5, Color.Violet, 6, Color.PaleVioletRed, 7, Color.LightGray)

Last part is to have a different word every day, we need 366 words, so I created a Named formula called Words, storing a Table with a property named Word:

Words = Table({Word:"apple"},{Word:"bread"},{Word:"crane"}, ...)

This is a bit tricky, inside a Canvas app we don't have a function as DayOfYear so I needed to use DateDiff function with a combination of Year and Today functions:

Index(Words,DateDiff("1/1/"& Text(Year(Today())),Today())+1).Word

The Year is used to get the first day of the year, DateDiff calculates the difference and we add 1 because Index to access the table starts from 1.

Now the app is ready, here a video in action (I left the timers and the value of the Mod variable visible):

September 12, 2024

new project: Hōjin Bangō Custom APIs (Japanese Corporate Number)

I was recently in Japan (not my first time there) and each time I try to learn a bit about the culture.
One of my recent encounters is the Corporate Number called in Japan hōjin bangō (法人番号), in a certain way the equivalent of a VAT Number to identify a company.

My next thought was: I am sure there is a service to check the validity of these corporate numbers.

There is indeed a web site by the National Tax Agency in English and Japanese and looks like there is also a web service to check the validity by using an API, more info (only in Japanese) here.

I am not proficient in Japanese but with the help of Google Translate looks like this endpoint is not public (like the EU one) but requires a registration and can take up to a month.

For me it's not possible to use this API endpoint but their website allows to search without registration a corporate number.

Next step was to search for some Japanese corporate numbers to verify them, quickly I found the number of two companies: Nintendo (1130001011420) and Sony (5010401067252) ;)

This is a website screenshot with a result, if the number is correct, the website returns the company name (also in Furigana) and the address:

My goal was to create a Custom API to verify a corporate number, because I am not able to use their API, I used the old WebClient to call the page and parse the returned content.

I am aware this is not a robust situation but we can apply this technique when an API is not available and the parsing of the page is not complex.

The Tax Agency website accepts a URL in the following format:

https://www.houjin-bangou.nta.go.jp/henkorireki-johoto.html?selHouzinNo=

followed by the corporate number

and if the number is found, the details are contained inside a dl tag (Description List).

The Custom API call the parameterized URL, parse the response and returns 4 properties:

  • Success (if the number is found or not)
  • CompanyName1
  • CompanyName2
  • Address
You can find the code and the managed solution inside the repository:

Here a screenshot of this Custom API inside a Power Automate flow using the "Perform an unbound action":


hope it helps!

July 12, 2024

Rich Text to Plain Text conversion inside Power Apps

Sometimes we need to get only the text from an HTML document, like the Rich Text format available for the text type inside Dataverse/Model-driven app.

If you need to perform this action client-side, a simple JavaScript function can be used:

function parseHTML(html) {
	let doc = new DOMParser().parseFromString(html, 'text/html');
	return doc.body.textContent || "";
}

function test_richtext_OnChange(executionContext) {
	var formContext = executionContext.getFormContext();
	let richTextValue = formContext.getAttribute("test_richtext").getValue();
	let cleanValue = parseHTML(richTextValue);
	formContext.getAttribute("test_plaintext").setValue(cleanValue);
}

It uses the DOMParser interface, here a screenshot on how the result looks like inside a model-driven app:


Hope it helps!

May 17, 2024

Power Fx and what I mean for low-code

Power Fx is one of the programming languages available inside Power Platform, the Microsoft documentation reports:

Power Fx is the low-code language that will be used across Microsoft Power Platform.

It's mostly used inside Canvas Apps but inside a canvas app it's very difficult for me to call it "low-code", if there is a function called "Explain This Formula" inside Copilot (link) it usually means it's hard to read or people tend to write complicated code that is not readable.

Being a developer probably for me it's easier to read some C# code than some Power Fx formula connected to items inside a canvas app where fields are referenced with the display name.

However there is another part where Power Fx is used inside Power Platform: the possibility to create new Formula columns inside Dataverse, in my opinion this is a very powerful tool at our disposal.

Years ago I created this PCF: Custom Url Control
The idea behind the PCF was simple, to create a clickable url with data coming from the record.

The same thing these days can be done with a Formula column writing a simple Power Fx formula.

Let's assume you have two columns inside a table: Code (text containing the tracking code) and Company (choice with the couriers, in my example USPS and UPS)

We want to create a URL column so when the Company is USPS the link is:
https://tools.usps.com/go/TrackConfirmAction?qtc_tLabels1=[Code]
and when the Company is UPS the link is:
https://www.ups.com/track?tracknum=[Code]

This column can be a Power Fx formula using a Switch statement:

Switch(Company, 'Company (Shipments)'.USPS, "https://tools.usps.com/go/TrackConfirmAction?qtc_tLabels1=" & Code, 'Company (Shipments)'.UPS, "https://www.ups.com/track?tracknum=" & Code )

In this case the first parameter of the Switch operator is the column we are checking: our Company column.
The following parameters needs to be considered by two: Match and Result.
Match in our case is the choice value (USPS) and the Result is the URL we want, the first part is fixed (the USPS website) and after is concatenated the Code.
You can also see the second couple (UPS choice and UPS website).

The result in a model-driven app form is the following:


The main advantage? The value of this column is available everywhere: inside a model-driven app, a canvas app, a Power BI report, a Power Automate flow, etc etc.

This is in my opinion a good example of low-code, you wrote something simple, understandable but very powerful, years ago for the same requirement you needed to create a PCF, before that probably a C# plugin, now just a short Power Fx formula.

April 20, 2024

My idea to give something to the community: the CCA License!

If you follow tech news you may have read something about "xz Utils" (you can find an article about it here).

I don't have a solution to this kind of problems and my support goes to Lasse Collin, the creator and my maintainer of xz Utils.

How an Open Source software is licensed plays an important role and made me think:

what can I add to the MIT License (the license I normally use) something to recognize the community around what I am releasing?

This is the idea behind the CCA License (link: https://github.com/GuidoPreite/CCA-License)

CCA stands for Community Contributor Awareness, practically is a MIT License with the addition of a donation clause.

With the next releases of some of my tools I will start to use the CCA license, with this donation clause:

XrmToolBox or any of the Open Source tools in its library, any time, no minimum amount required or you are a code contributor of an Open Source software related to XrmToolBox.

What does it means?

It means that in order to use my software and be complaint with its license, the end user must have donated to XrmToolBox or any of the Open Source tools in its library, I don't care if you donated in 2018 or in 2024 (for me the important is that you donated), I don't care how much you donated (we live in different parts of the world), also you can use my software if you created an Open Source tool for XrmToolBox.

The GitHub repository of the CCA License has some examples of donation clauses.

XrmToolBox is an important software for anyone working with the Power Platform and it's free. I use it everyday, what I am doing with this new license is to help with this project and the ecosystem around it.

I am well aware this license will not change the world but I hope it can help a little some projects that are essential to this community.


February 25, 2024

new project: QR Code Custom APIs

As I wrote in my previous post, in the recent months I created several Custom APIs and some of them are available inside my GitHub account.

The latest one is QR Code Custom APIs

Right now there is a single Custom API called GenerateQRCodeUrl

As input accepts a Url (string) and it returns the Base64 representation (string) of a PNG file, this can be used for example inside HTML content (setting the src property like data:image/png;base64, [BASE64 VALUE]) or for example to store the value as a note/attachment.

Here an example of a QR Code generated with this Custom API (it points to www.microsoft.com)


Big thanks to the project QRCoder that I am using inside this Custom API.

February 9, 2024

Impersonate Dataverse Users connected to Entra ID Groups

When a Security Group is assigned to a Dataverse Environment users need to be part of the selected Microsoft Entra ID Group (directly as members or if they are inside a group that is member of the main group) otherwise they cannot be added.

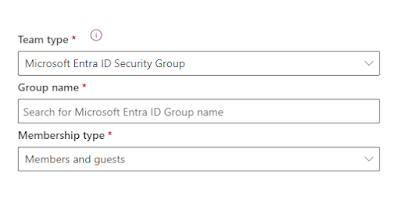
This facilitates the work of the IT department to manage who can access or not a specific environment, also a specific Team inside Dataverse can be created to map the Microsoft Entra ID Group:
Keep in mind that to a Dataverse Team you can assign Security Roles or Column Security Profiles.
Which is the disadvantage? By default users appear inside the Environment only after their first login, for some apps this is not a big deal, but for other apps users must be present before their first login.

To force the users you can use a PowerShell cmdlet (link) or a Power Automate flow (link1, link2), in this way the users will be added to the environment and they will appear inside the systemuser table.

However this approach solves half of the problem (in my opinion) because the users are added indeed to the Environment, but they are not added to the Dataverse Team connected to the Entra ID Group they are coming from, the association to the Team will happen indeed at their first login.

Let's recap: inside Entra we have the user "John Doe", it has been added inside the Entra ID Group called "Super Users" setup as Security Group for the Environment.
Inside the Environment there is the Team (Entra ID type) connected to Entra "Super Users", we forced the synchronization of the user so there is a systemuser record related to "John Doe" but this record is not associated with the Team "Super Users".

And you can think: why we should care? the problem is that the user is inside the Environment but without security roles, probably the security roles will be inherited from the Teams the user is a member of, but right now is not member of any team, they need to login first.

Again: why we should care? the problem is that if the user has no security roles, the user cannot be the owner of a record inside your Environment.

Think about a migration: you have 500 users, and 10000 account records to migrate from Ennvironment A to Environment B, these 500 users they have the right security role by the Team described above but we cannot assign them an account until they login first.

The solution is to programmatically impersonate these users and perform an action inside the Dataverse, in this way we simulate a login and all the processes associated with it (including the association to the Team)

You can probably do this with a Power Automate flow but I decided to implement this logic in C#, mainly because the WhoAmI request is not available inside the unbound actions but is one of the common requests to be executed using the C# Dataverse SDK:
QueryExpression querySystemUsers = new QueryExpression("systemuser");
querySystemUsers.ColumnSet = new ColumnSet("fullname");
EntityCollection collSystemUsers = service.RetrieveMultiple(querySystemUsers);
// Note: if your users are more than 5000 you need to do pagination!

Dictionary<Guid, string> dictErrors = new Dictionary<Guid, string>();
foreach (Entity user in collSystemUsers.Entities)
{
    try
    {
        service.CallerId = user.Id;
        service.Execute(new WhoAmIRequest());
    }
    catch (Exception ex)
    {
        dictErrors.Add(user.Id, $"{user.GetAttributeValue("fullname")} - {ex.Message}");
    }
}
As you can see inside the code, the property "CallerId" is used to impersonate the user before executing the WhoAmIRequest (probably you can use also the property "CallerAADObjectId" if you have a list of the Entra Object IDs if the users are not synced before).

Why I added a try/catch inside my code? If for example the user has not a license, it will throw an exception, so better to handle this scenario as well.

Hope it helps!


January 9, 2024

Custom APIs for Power Automate: why they should be developed

Power Automate is an important piece of the Power Platform, no doubts about this.
Can it be improved? Sure.

Low-Code and Pro-Code are two buzz words constantly being around Power Platform, which side you prefer it's not my business, as I often says there are different ways to implement a process, it's also the beauty of programming (traditional or visual).

One thing I do not like is to create convoluted processes to achieve something that is very easy using another tool, we always need to tend to simplification in my opinion, considering the context where the application lives.

How can we improve and simplify flows created in Power Automate? If your flows have Dataverse at your disposal, one way is definitely Custom APIs.

The documentation link is this one https://learn.microsoft.com/en-us/power-apps/developer/data-platform/custom-api and at the beginning is written:

"...you and other developers can call in their code or from Power Automate."

Last Nordic Summit I had the pleasure to meet Amey Holden, she presented a session about Power Automate and one of the examples she demoed was about Choices, she needed to query the Metadata and her flow was working. However I instantly saw the opportunity to create something to help the specific task she faced. The result was a Custom API and she described it in this blog post:

Converting Dataverse Choice(s), (Multi-select) Option Sets, or Picklists in Power Automate

The Custom API I created (download here) simplified the flow, no need to query the Metadata writing the http query, no need to add special conditions, it's just a block doing the task but it's easy to use and does the work.

Why I am talking now about this? In the last months I created several Custom APIs designed to be used inside Power Automate flows, and yesterday I created another one that is public (RegexCustomAPIs) to execute Regex operations. (thanks Mark Christie for giving me the idea).

The Regex operations available are Match and Replace and they may fail sometimes due to the Regex pattern passed as input, but it's a starting point. As I said in the beginning there are different ways to implement something and you can find other ways to execute a Regex inside Power Automate, what I created is just another way and it may be useful to you.

So next time you are creating a flow and you think a Custom API can make the flow easier to interact and less cluttered, worth asking if it's doable.